Contents
Introduction:
Hello fellow dev, in this blog I will be showing you how to make a Symfony 5 REST API. REST API is used for communication between client and server. REST stands for representational state transfer and API stand for application programming interface. REST API or also known as RESTful API is a type of API that uses the REST architectural style, an API is uses REST if it has this characteristics:
- Client-Server – The communication between Client and Server.
- Stateless – After the server completed a http request, no session information is retained on the server.
- Cacheable – Response from the server can be cacheable or non cacheable.
- Uniform Interface – This are the constraints that simplify things. The constraints are Identification of the resources, resource manipulation through representations, self-descriptive messages, hypermedia as the engine of application state.
- Layered System – These are intermediaries between client and server like proxy servers, cache servers, etc.
- Code on Demand(Optional) – This is optional, the ability of the server to send executable codes to the client like java applets or JavaScript code, etc.
Now you have a bit of insights about REST API. we will now proceed on creating this on Symfony 5.
What is Symfony? Symfony is a PHP framework used to develop web application, APIs, microservices and web services. Symfony is one of the leading PHP framework for creating websites and web application.
Prerequisite:
- Composer
- Symfony CLI
- MySQL
- PHP >= 7.2.5
Step 1: Install Symfony 5
First, select a folder that you want Symfony to be installed then execute this command on Terminal or CMD to install:
Install via composer:
composer create-project symfony/skeleton symfony-5-rest-api
Install via Symfony CLI:
symfony new symfony-5-rest-api
Step 2: Install Packages
After installing Symfony, we must install the necessary packages for our REST API. During the installation of the packages, it will ask you to execute the recipe’s, type y to confirm.
composer require jms/serializer-bundle
composer require friendsofsymfony/rest-bundle
composer require symfony/maker-bundle
composer require symfony/orm-pack
Step 3: Configure FOSRest Bundle
Open the file config/packages/fos_rest.yaml and add these line:
config/packages/fos_rest.yaml
fos_rest:
    format_listener:
        rules:
            - { path: ^/api, prefer_extension: true, fallback_format: json, priorities: [ json, html ] }
Step 4: Set Database Configuration
After installing, open the .env file and set database configuration. We will be using MySQL on this tutorial. Uncomment the DATABASE_URL variable for MySQL and updates its configs. Make sure you commented out the other DATABASE_URL variables.
.env
# In all environments, the following files are loaded if they exist,
# the latter taking precedence over the former:
#
#  * .env                contains default values for the environment variables needed by the app
#  * .env.local          uncommitted file with local overrides
#  * .env.$APP_ENV       committed environment-specific defaults
#  * .env.$APP_ENV.local uncommitted environment-specific overrides
#
# Real environment variables win over .env files.
#
# DO NOT DEFINE PRODUCTION SECRETS IN THIS FILE NOR IN ANY OTHER COMMITTED FILES.
#
# Run "composer dump-env prod" to compile .env files for production use (requires symfony/flex >=1.2).
# https://symfony.com/doc/current/best_practices.html#use-environment-variables-for-infrastructure-configuration

###> symfony/framework-bundle ###
APP_ENV=dev
APP_SECRET=e0710317861221371d185cc932acd15b
###< symfony/framework-bundle ###

###> doctrine/doctrine-bundle ###
# Format described at https://www.doctrine-project.org/projects/doctrine-dbal/en/latest/reference/configuration.html#connecting-using-a-url
# IMPORTANT: You MUST configure your server version, either here or in config/packages/doctrine.yaml
#
# DATABASE_URL="sqlite:///%kernel.project_dir%/var/data.db"
# DATABASE_URL="mysql://db_user:db_password@127.0.0.1:3306/db_name?serverVersion=5.7"
DATABASE_URL="postgresql://db_user:db_password@127.0.0.1:5432/db_name?serverVersion=13&charset=utf8"
###< doctrine/doctrine-bundle ###
After configurating the database, execute this command to create database:
php bin/console doctrine:database:create
Step 4: Create Entity and Migration
Entity– it a class that represents a database table.
Migration – like version control for the database that allows us to modify and share database schema to your team.
Execute this command to create an Entity:
php bin/console make:entity
After executing the command above, it will ask question – follow the steps below:
Class name of the entity to create or update (e.g. BraveElephant):
 > Project
Project

 created: src/Entity/Project.php
 created: src/Repository/ProjectRepository.php

 Entity generated! Now let's add some fields!
 You can always add more fields later manually or by re-running this command.

New property name (press <return> to stop adding fields):
 > name

 Field type (enter ? to see all types) [string]:
 > string
string

 Field length [255]:
 > 255

 Can this field be null in the database (nullable) (yes/no) [no]:
 > no

 updated: src/Entity/Project.php

 Add another property? Enter the property name (or press <return> to stop adding fields):
 > description

 Field type (enter ? to see all types) [string]:
 > text
text

 Can this field be null in the database (nullable) (yes/no) [no]:
 > no

 Add another property? Enter the property name (or press <return> to stop adding fields):
 >


  Success!


 Next: When you're ready, create a migration with php bin/console make:migration
Now that we have finished creating an entity, we will then create a migration:
php bin/console make:migration
This will create a migration file, inside the migration file contains SQL. we will then run the SQL using this command:
php bin/console doctrine:migrations:migrate
Step 4: Generate Controller
A Controller is the one responsible for receiving Request and returning Response.
Execute this command:
php bin/console make:controller ProjectController
After creating the Controller add these line of codes:
src/Controller/ProjectController.php
<?php

namespace App\Controller;

use Symfony\Bundle\FrameworkBundle\Controller\AbstractController;
use Symfony\Component\HttpFoundation\Response;
use Symfony\Component\Routing\Annotation\Route;
use Symfony\Component\HttpFoundation\Request;
use App\Entity\Project;

/**
 * @Route("/api", name="api_")
 */
class ProjectController extends AbstractController
{
    /**
     * @Route("/project", name="project_index", methods={"GET"})
     */
    public function index(): Response
    {
        $products = $this->getDoctrine()
            ->getRepository(Project::class)
            ->findAll();

        $data = [];

        foreach ($products as $product) {
           $data[] = [
               'id' => $product->getId(),
               'name' => $product->getName(),
               'description' => $product->getDescription(),
           ];
        }


        return $this->json($data);
    }

    /**
     * @Route("/project", name="project_new", methods={"POST"})
     */
    public function new(Request $request): Response
    {
        $entityManager = $this->getDoctrine()->getManager();

        $project = new Project();
        $project->setName($request->request->get('name'));
        $project->setDescription($request->request->get('description'));

        $entityManager->persist($project);
        $entityManager->flush();

        return $this->json('Created new project successfully with id ' . $project->getId());
    }

    /**
     * @Route("/project/{id}", name="project_show", methods={"GET"})
     */
    public function show(int $id): Response
    {
        $project = $this->getDoctrine()
            ->getRepository(Project::class)
            ->find($id);

        if (!$project) {

            return $this->json('No project found for id' . $id, 404);
        }

        $data =  [
            'id' => $project->getId(),
            'name' => $project->getName(),
            'description' => $project->getDescription(),
        ];

        return $this->json($data);
    }

    /**
     * @Route("/project/{id}", name="project_edit", methods={"PUT"})
     */
    public function edit(Request $request, int $id): Response
    {
        $entityManager = $this->getDoctrine()->getManager();
        $project = $entityManager->getRepository(Project::class)->find($id);

        if (!$project) {
            return $this->json('No project found for id' . $id, 404);
        }

        $project->setName($request->request->get('name'));
        $project->setDescription($request->request->get('description'));
        $entityManager->flush();

        $data =  [
            'id' => $project->getId(),
            'name' => $project->getName(),
            'description' => $project->getDescription(),
        ];

        return $this->json($data);
    }

    /**
     * @Route("/project/{id}", name="project_delete", methods={"DELETE"})
     */
    public function delete(int $id): Response
    {
        $entityManager = $this->getDoctrine()->getManager();
        $project = $entityManager->getRepository(Project::class)->find($id);

        if (!$project) {
            return $this->json('No project found for id' . $id, 404);
        }

        $entityManager->remove($project);
        $entityManager->flush();

        return $this->json('Deleted a project successfully with id ' . $id);
    }


}
Step 6: Run the Application
After finishing the steps above, you can now run your application by executing the command below:
symfony server:start
After successfully running your app, open this URL in your browser:
http://localhost:8000/project
Test the API:
We will be using Postman for testing our API, but you can use you preferred tool.
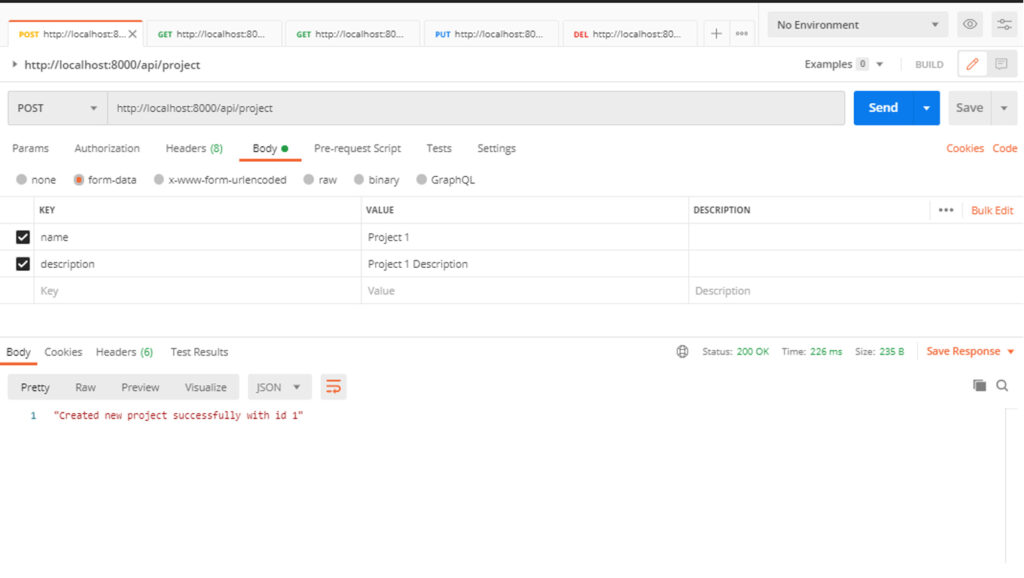
POST Request – This request will create a new resource.
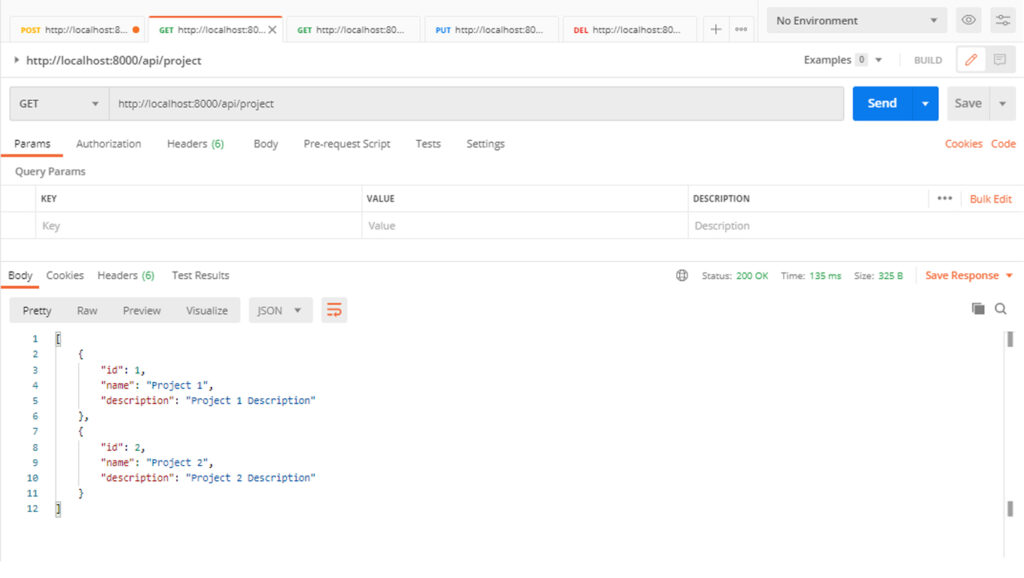
GET Request – This request will retrieve all the resources.
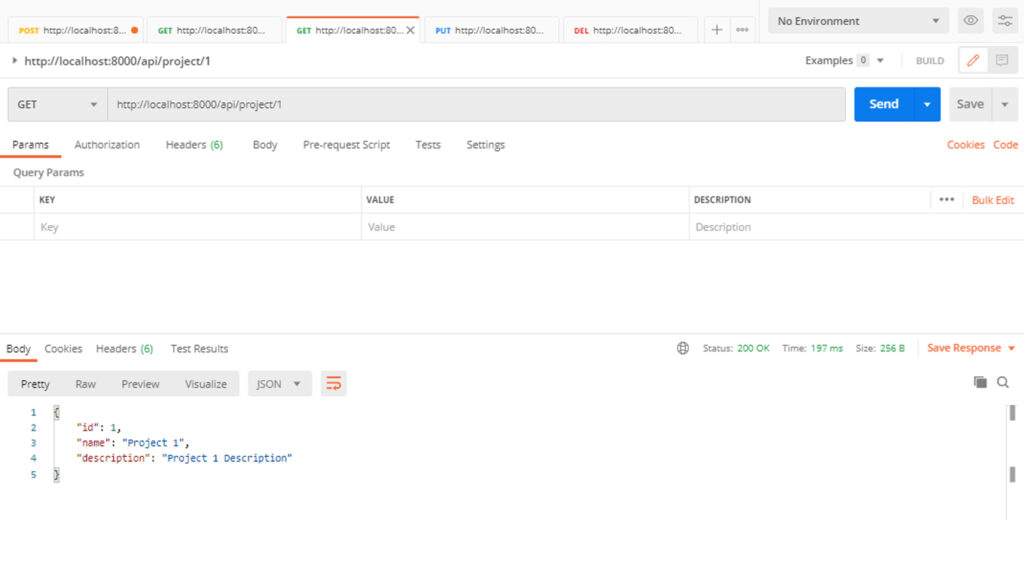
GET Request (with id) – This request will retrieve a particular resource.
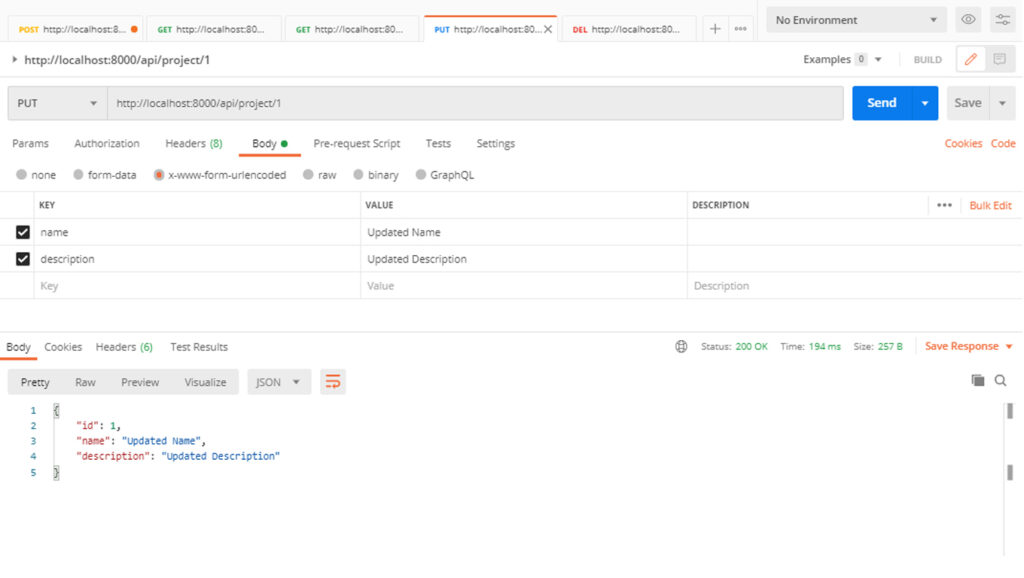
PUT Request or you can use the PATCH Request – This request will update a resource.
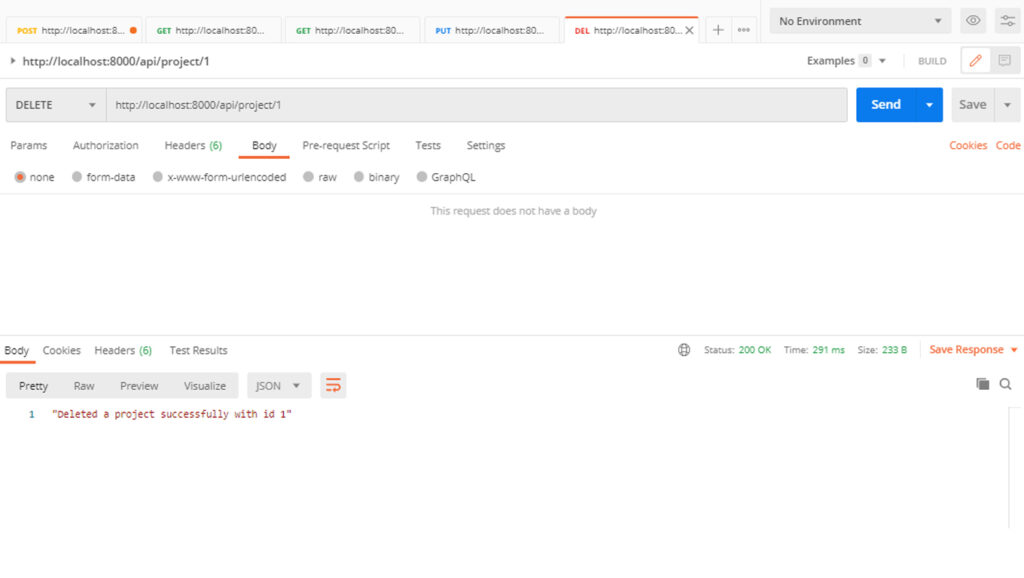
DELETE Request – This request will delete a resource.
