Contents
Most of the web apps today that has users or different types of users requires login or authentication to safeguard the functionalities and data information of the system. And today, I will show you how to make a user login and registration in CodeIgniter 4.
CodeIgniter is one of the most powerful PHP frameworks. It is an open-source web framework that is used for rapid web development. It is popular for its exceptional performance, small footprint, requires nearly zero configuration, thorough documentation and many more.
If you want to learn more about CodeIgniter, you can check and read their documentation.
Now we proceed to show you how to make user login and registration in CodeIgniter 4:
Tutorial Video:
Step 1: Install CodeIgniter 4
For us to install CodeIgniter 4 we can install via composer or directly download CodeIgniter 4 here:
Install via composer:
composer create-project codeigniter4/appstarter ci-4-user-login-registration
Step 2: Change CodeIgniter Environment
The default environment of CodeIgniter is production, it is a safety feature to add security in case settings are messed up when it goes live. For us to change the environment we will rename or copy the file env to .env. Once it is renamed, open the file and uncomment and change the CI_ENVIRONMENT value from production to development.
.env
CI_ENVIRONMENT = development
Step 3: Configure Database
After setting up the environment, we will then configure our database. You can configure it on .env or on the config file located at app/Config/Database.php. For this tutorial we will configure it on app/Config/Database.php.
Configure the database connection values:
app/Config/Database.php.
<?php

namespace Config;

use CodeIgniter\Database\Config;

/**
 * Database Configuration
 */
class Database extends Config
{
	/**
	 * The directory that holds the Migrations
	 * and Seeds directories.
	 *
	 * @var string
	 */
	public $filesPath = APPPATH . 'Database' . DIRECTORY_SEPARATOR;

	/**
	 * Lets you choose which connection group to
	 * use if no other is specified.
	 *
	 * @var string
	 */
	public $defaultGroup = 'default';

	/**
	 * The default database connection.
	 *
	 * @var array
	 */
	public $default = [
		'DSN'      => '',
		'hostname' => 'localhost',
		'username' => 'root',
		'password' => '',
		'database' => 'ci_4_login_register',
		'DBDriver' => 'MySQLi',
		'DBPrefix' => '',
		'pConnect' => false,
		'DBDebug'  => (ENVIRONMENT !== 'production'),
		'charset'  => 'utf8',
		'DBCollat' => 'utf8_general_ci',
		'swapPre'  => '',
		'encrypt'  => false,
		'compress' => false,
		'strictOn' => false,
		'failover' => [],
		'port'     => 3306,
	];

	/**
	 * This database connection is used when
	 * running PHPUnit database tests.
	 *
	 * @var array
	 */
	public $tests = [
		'DSN'      => '',
		'hostname' => '127.0.0.1',
		'username' => '',
		'password' => '',
		'database' => ':memory:',
		'DBDriver' => 'SQLite3',
		'DBPrefix' => 'db_',  // Needed to ensure we're working correctly with prefixes live. DO NOT REMOVE FOR CI DEVS
		'pConnect' => false,
		'DBDebug'  => (ENVIRONMENT !== 'production'),
		'charset'  => 'utf8',
		'DBCollat' => 'utf8_general_ci',
		'swapPre'  => '',
		'encrypt'  => false,
		'compress' => false,
		'strictOn' => false,
		'failover' => [],
		'port'     => 3306,
	];

	//--------------------------------------------------------------------

	public function __construct()
	{
		parent::__construct();

		// Ensure that we always set the database group to 'tests' if
		// we are currently running an automated test suite, so that
		// we don't overwrite live data on accident.
		if (ENVIRONMENT === 'testing')
		{
			$this->defaultGroup = 'tests';
		}
	}

	//--------------------------------------------------------------------

}
Step 4: Create A Model and Migration
Model – it a class that represents a database table.
Migration – like version control for the database that allows us to modify and share database schema to your team.
Execute this command on the Terminal or CMD to create a model:
php spark make:model UserModel
open the created model at app/Models/UserModel.php. Inside the file you can see configuration options, you can read the documentation to further learn about its configuration options. We will now update the configs:
app/Models/UserModel.php
<?php

namespace App\Models;

use CodeIgniter\Model;

class UserModel extends Model
{
	protected $DBGroup              = 'default';
	protected $table                = 'users';
	protected $primaryKey           = 'id';
	protected $useAutoIncrement     = true;
	protected $insertID             = 0;
	protected $returnType           = 'array';
	protected $useSoftDeletes       = false;
	protected $protectFields        = true;
	protected $allowedFields        = ['email', 'password'];

	// Dates
	protected $useTimestamps        = true;
	protected $dateFormat           = 'datetime';
	protected $createdField         = 'created_at';
	protected $updatedField         = 'updated_at';
	protected $deletedField         = 'deleted_at';

	// Validation
	protected $validationRules      = [];
	protected $validationMessages   = [];
	protected $skipValidation       = false;
	protected $cleanValidationRules = true;

	// Callbacks
	protected $allowCallbacks       = true;
	protected $beforeInsert         = [];
	protected $afterInsert          = [];
	protected $beforeUpdate         = [];
	protected $afterUpdate          = [];
	protected $beforeFind           = [];
	protected $afterFind            = [];
	protected $beforeDelete         = [];
	protected $afterDelete          = [];
}
After creating the model, we will then create a migration file.
Execute this command on the Terminal or CMD to create a migration:
php spark make:migration AddUser
Open the created migration file on app/Database/Migrations/ and paste these codes:
<?php

namespace App\Database\Migrations;

use CodeIgniter\Database\Migration;

class AddUser extends Migration
{
	public function up()
	{
		$this->forge->addField([
            'id' => [
				'type' => 'BIGINT',
				'constraint' => 255,
				'unsigned' => true,
				'auto_increment' => true
            ],
            'email' => [
				'type' => 'VARCHAR',
				'unique' => true,
				'constraint' => '255',
            ],
            'password' => [
				'type' => 'VARCHAR',
				'constraint' => '255',
            ],
            'created_at' => [
				'type' => 'TIMESTAMP',
				'null' => true
            ],
            'updated_at' => [
				'type' => 'TIMESTAMP',
				'null' => true
            ],
        ]);
        $this->forge->addPrimaryKey('id');
        $this->forge->createTable('users');
	}

	public function down()
	{
		$this->forge->dropTable('users');
	}
}
Run the migration by executing the migrate command:
php spark migrate
Step 5: Create Controllers
A Controller is the one responsible for receiving Request and returning Response.
Execute this command on the Terminal or CMD to create a the Controllers:
php spark make:controller Login
php spark make:controller Register
php spark make:controller Dashboard
After executing the command, it will create files located at app/Controllers. Open those file and insert these codes:
app/Controllers/Login.php
<?php

namespace App\Controllers;

use App\Controllers\BaseController;
use App\Models\UserModel;

class Login extends BaseController
{
	public function index()
    {
        return view('login');
    }

    public function authenticate()
    {
        $session = session();
        $userModel = new UserModel();

        $email = $this->request->getVar('email');
        $password = $this->request->getVar('password');

        $user = $userModel->where('email', $email)->first();

        if(is_null($user)) {
			return redirect()->back()->withInput()->with('error', 'Invalid username or password.');
		}

		$pwd_verify = password_verify($password, $user['password']);

		if(!$pwd_verify) {
			return redirect()->back()->withInput()->with('error', 'Invalid username or password.');
		}

		$ses_data = [
			'id' => $user['id'],
			'email' => $user['email'],
			'isLoggedIn' => TRUE
		];

		$session->set($ses_data);
		return redirect()->to('/dashboard');


    }

	public function logout() {
		session_destroy();
		return redirect()->to('/login');
	}
}
app/Controllers/Register.php
<?php

namespace App\Controllers;

use App\Controllers\BaseController;
use App\Models\UserModel;

class Register extends BaseController
{

    public function __construct(){
        helper(['form']);
    }

	public function index()
    {
        $data = [];
        return view('register', $data);
    }

    public function register()
    {
        $rules = [
            'email' => ['rules' => 'required|min_length[4]|max_length[255]|valid_email|is_unique[users.email]'],
            'password' => ['rules' => 'required|min_length[8]|max_length[255]'],
            'confirm_password'  => [ 'label' => 'confirm password', 'rules' => 'matches[password]']
        ];


        if($this->validate($rules)){
            $model = new UserModel();
            $data = [
                'email'    => $this->request->getVar('email'),
                'password' => password_hash($this->request->getVar('password'), PASSWORD_DEFAULT)
            ];
            $model->save($data);
            return redirect()->to('/login');
        }else{
            $data['validation'] = $this->validator;
            return view('register', $data);
        }

    }
}
app/Controllers/Dashboard.php
<?php

namespace App\Controllers;

use App\Controllers\BaseController;

class Dashboard extends BaseController
{
	public function index()
	{
		return view('dashboard');
	}
}
Step 6: Create Controller Filters
Controller Filters are classes that allows us to perform actions before or after the controllers execute.
We create 2 controller filter:
- authFilter – to filter authenticated users
- guestFilter – to filter unauthenticated users
Execute this command on the Terminal or CMD to create a the Filters:
php spark make:filter AuthFilter
php spark make:filter GuestFilter
After executing the command, it will create files located at app/Filters. Open those file and insert these codes:
app/Filters/AuthFilter.php
<?php

namespace App\Filters;

use CodeIgniter\Filters\FilterInterface;
use CodeIgniter\HTTP\RequestInterface;
use CodeIgniter\HTTP\ResponseInterface;

class AuthFilter implements FilterInterface
{
	/**
	 * Do whatever processing this filter needs to do.
	 * By default it should not return anything during
	 * normal execution. However, when an abnormal state
	 * is found, it should return an instance of
	 * CodeIgniter\HTTP\Response. If it does, script
	 * execution will end and that Response will be
	 * sent back to the client, allowing for error pages,
	 * redirects, etc.
	 *
	 * @param RequestInterface $request
	 * @param array|null       $arguments
	 *
	 * @return mixed
	 */
	public function before(RequestInterface $request, $arguments = null)
	{
		if (!session()->get('isLoggedIn'))
        {
            return redirect()->to('/login');
        }
	}

	/**
	 * Allows After filters to inspect and modify the response
	 * object as needed. This method does not allow any way
	 * to stop execution of other after filters, short of
	 * throwing an Exception or Error.
	 *
	 * @param RequestInterface  $request
	 * @param ResponseInterface $response
	 * @param array|null        $arguments
	 *
	 * @return mixed
	 */
	public function after(RequestInterface $request, ResponseInterface $response, $arguments = null)
	{
		//
	}
}
app/Filters/GuestFilter.php
<?php

namespace App\Filters;

use CodeIgniter\Filters\FilterInterface;
use CodeIgniter\HTTP\RequestInterface;
use CodeIgniter\HTTP\ResponseInterface;

class GuestFilter implements FilterInterface
{
	/**
	 * Do whatever processing this filter needs to do.
	 * By default it should not return anything during
	 * normal execution. However, when an abnormal state
	 * is found, it should return an instance of
	 * CodeIgniter\HTTP\Response. If it does, script
	 * execution will end and that Response will be
	 * sent back to the client, allowing for error pages,
	 * redirects, etc.
	 *
	 * @param RequestInterface $request
	 * @param array|null       $arguments
	 *
	 * @return mixed
	 */
	public function before(RequestInterface $request, $arguments = null)
	{
		if (session()->get('isLoggedIn'))
        {
            return redirect()->to('/dashboard');
        }
	}

	/**
	 * Allows After filters to inspect and modify the response
	 * object as needed. This method does not allow any way
	 * to stop execution of other after filters, short of
	 * throwing an Exception or Error.
	 *
	 * @param RequestInterface  $request
	 * @param ResponseInterface $response
	 * @param array|null        $arguments
	 *
	 * @return mixed
	 */
	public function after(RequestInterface $request, ResponseInterface $response, $arguments = null)
	{
		//
	}
}
After creating the filters, we must add it to filters config located at app/Config/Filters.php. We will creating an alias for our filters.
app/Config/Filters.php
public $aliases = [
		'csrf'     => CSRF::class,
		'toolbar'  => DebugToolbar::class,
		'honeypot' => Honeypot::class,
		'authFilter' => \App\Filters\AuthFilter::class,
		'guestFilter' => \App\Filters\GuestFilter::class,
	];
Step 7: Register Routes
Open the config file for routing located at app/Config/Routes.php and register these routes:
/*
 * --------------------------------------------------------------------
 * Route Definitions
 * --------------------------------------------------------------------
 */
$routes->setDefaultController('Register');
$routes->get('/', 'Register::index', ['filter' => 'guestFilter']);
$routes->get('/register', 'Register::index', ['filter' => 'guestFilter']);
$routes->post('/register', 'Register::register', ['filter' => 'guestFilter']);

$routes->get('/login', 'Login::index', ['filter' => 'guestFilter']);
$routes->post('/login', 'Login::authenticate', ['filter' => 'guestFilter']);

$routes->get('/logout', 'Login::logout', ['filter' => 'authFilter']);
$routes->get('/dashboard', 'Dashboard::index', ['filter' => 'authFilter']);
Step 8: Create View Files
View files are web page or fragments of a page like header or footer and etc. Views can be embedded to other views whenever you need hierarchy on view files.
We will create out view files in this path app/Views.
- layout.php
- login.php
- register.php
- dashboard.php
After creating the view files, Insert the code below:
app/Views/layout.php
<!DOCTYPE html>
<html>
<head>
    <title>CodeIgniter Login and Register</title>
    <link href="https://cdn.jsdelivr.net/npm/bootstrap@5.0.2/dist/css/bootstrap.min.css" rel="stylesheet" integrity="sha384-EVSTQN3/azprG1Anm3QDgpJLIm9Nao0Yz1ztcQTwFspd3yD65VohhpuuCOmLASjC" crossorigin="anonymous">
    <script src="https://cdn.jsdelivr.net/npm/bootstrap@5.0.2/dist/js/bootstrap.bundle.min.js" integrity="sha384-MrcW6ZMFYlzcLA8Nl+NtUVF0sA7MsXsP1UyJoMp4YLEuNSfAP+JcXn/tWtIaxVXM" crossorigin="anonymous"></script>
</head>
   <body>
      <?= $this->renderSection("content"); ?>
   <body>
</html>
app/Views/login.php
<?=$this->extend("layout")?>

<?=$this->section("content")?>

<div class="container">
    <div class="row justify-content-md-center mt-5">
        <div class="col-4">
            <div class="card">
                <div class="card-body">
                    <h5 class="card-title mb-4">Sign In</h5>
                    <?php if(session()->getFlashdata('error')):?>
                        <div class="alert alert-danger">
                            <?= session()->getFlashdata('error') ?>
                        </div>
                    <?php endif;?>
                    <form action="<?php echo base_url('/login'); ?>" method="post">
                        <div class="mb-3">
                            <label for="email" class="form-label">Email address</label>
                            <input type="email" class="form-control" id="email" name="email">
                        </div>
                        <div class="mb-3">
                            <label for="password" class="form-label">Password</label>
                            <input type="password" class="form-control" id="password" name="password">
                        </div>
                        <div class="d-grid gap-2">
                            <button type="submit" class="btn btn-primary btn-block">Login</button>
                            <p class="text-center">Don't have account? <a href="<?php echo base_url('/'); ?>">Register here</a><p>
                        </div>
                    </form>
                </div>
            </div>
        </div>
    </div>

</div>

<?=$this->endSection()?>
app/Views/register.php
<?=$this->extend("layout")?>

<?=$this->section("content")?>

<div class="container">
    <div class="row justify-content-md-center mt-5">
        <div class="col-4">
            <div class="card">
                <div class="card-body">
                    <h5 class="card-title mb-4">Register</h5>
                    <form action="<?php echo base_url('/register'); ?>" method="post">
                        <div class="mb-3">
                            <label for="email" class="form-label">Email address</label>
                            <input type="email" class="form-control" id="email" name="email" value="<?= set_value('email') ?>">
                            <?php if(isset($validation)):?>
                                <small class="text-danger"><?= $validation->getError('email') ?></small>
                            <?php endif;?>
                        </div>
                        <div class="mb-3">
                            <label for="password" class="form-label">Password</label>
                            <input type="password" class="form-control" id="password" name="password">
                            <?php if(isset($validation)):?>
                                <small class="text-danger"><?= $validation->getError('password') ?></small>
                            <?php endif;?>
                        </div>
                        <div class="mb-3">
                            <label for="confirm_password" class="form-label">Confirm Password</label>
                            <input type="password" class="form-control" id="confirm_password" name="confirm_password">
                            <?php if(isset($validation)):?>
                                <small class="text-danger"><?= $validation->getError('confirm_password') ?></small>
                            <?php endif;?>
                        </div>
                        <div class="d-grid gap-2">
                            <button type="submit" class="btn btn-primary btn-block">Register Now</button>
                            <p class="text-center">Have already an account <a href="<?php echo base_url('/login'); ?>">Login here</a><p>
                        </div>
                    </form>
                </div>
            </div>
        </div>
    </div>

</div>

<?=$this->endSection()?>
app/Views/dashboard.php
<?=$this->extend("layout")?>

<?=$this->section("content")?>

<div class="container">
    <div class="row justify-content-md-center mt-5">
        <div class="col-12">
            <nav class="navbar navbar-expand-lg navbar-light bg-light">
                <div class="container-fluid">
                    <a class="navbar-brand" href="#">Dashboard</a>
                    <div class="d-flex">
                        <ul class="navbar-nav">
                            <li class="nav-item">
                                <a class="nav-link " aria-current="page" href="<?php echo base_url('/logout'); ?>">Logout</a>
                            </li>
                        </ul>
                    </div>
                </div>
            </nav>
            <h2 class="text-center mt-5">User Dashboard</h2  >
        </div>
    </div>

</div>

<?=$this->endSection()?>
Step 8: Run the Application
Now that we have completed the steps above we will now run the app. To run the app, execute this command:
php spark serve
Open this URL in your browser and now you can test:
http://localhost:8080
Results:
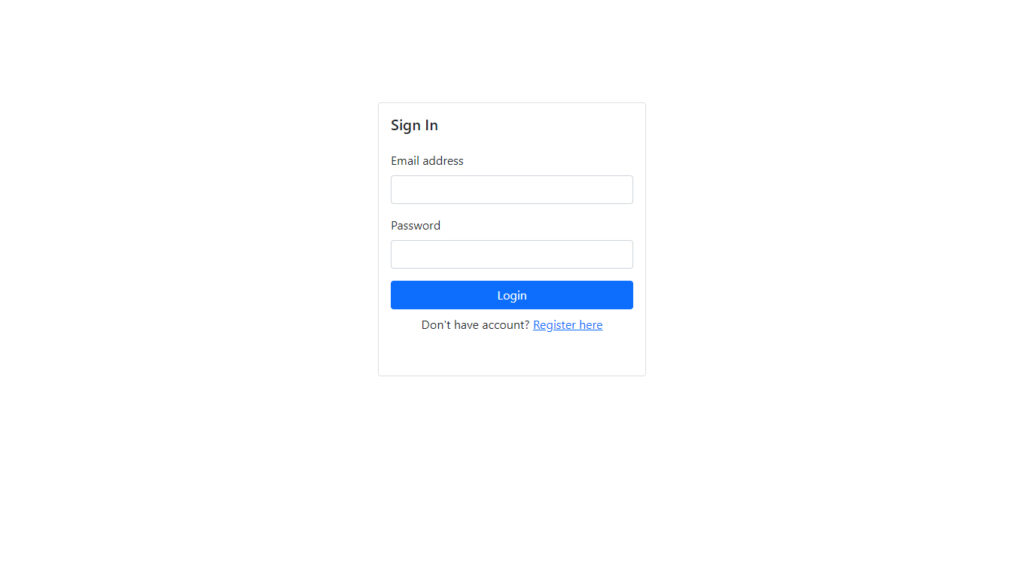
Login Page

Register Page

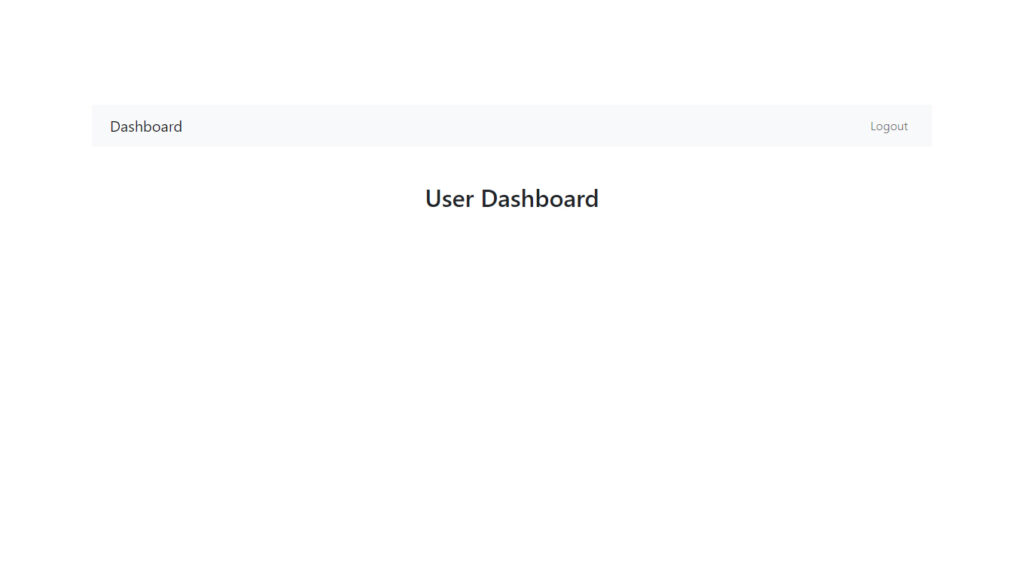
Dashboard Page


