Contents
Introduction:
Hi! Today we will learn how to create an authentication on our Laravel 10 API. But before that let’s have a discussion about API and what is JSON Web Token(JWT).
API stands for Application Program Interface, API is an interface that allows applications to exchange data. To make it more clear, API are set of functions that can be used by programmer to build software and applications.
JWT stands for JSON Web Token, it is an open standard (RFC 7519) that defines a compact and self-contained way for securely transmitting information between parties as a JSON object. JWT is commonly used for Authorization, Information Exchange and etc.
Now that we have a glimpse of idea on the topic, We will now proceed on building the app.
Step1: Install Laravel 10
Install via composer:
composer create-project laravel/laravel:^10.0 laravel-10-jwt
Install via Laravel Install:
laravel new laravel-10-jwt
Step 2: Set Database Configuration
Open the .env file and set the database configuration:
.env
DB_CONNECTION=mysql
DB_HOST=127.0.0.1
DB_PORT=3306
DB_DATABASE=your database name(laravel_10_jwt)
DB_USERNAME=your database username(root)
DB_PASSWORD=your database password(root)
Step 3: Execute Migration
Run the migration by executing the migrate Artisan command:
php artisan migrate
Step 4: Install and Setup JWT Auth package
Run the following command to pull in the latest version:
composer require php-open-source-saver/jwt-auth
publish the package config file:
php artisan vendor:publish --provider="PHPOpenSourceSaver\JWTAuth\Providers\LaravelServiceProvider"
generate a secret key. This will add JWT config values on .env file
php artisan jwt:secret
update auth guard config.
config/auth.php
 'defaults' => [
        'guard' => 'api',
        'passwords' => 'users',
    ],

'guards' => [
        'web' => [
            'driver' => 'session',
            'provider' => 'users',
        ],

        'api' => [
            'driver' => 'jwt',
            'provider' => 'users',
        ],
    ],
Step 5: Update User Model
Implement first the Tymon\JWTAuth\Contracts\JWTSubject contract on the User Model and implement the getJWTIdentifier() and getJWTCustomClaims() methods.
<?php

namespace App\Models;

use Illuminate\Contracts\Auth\MustVerifyEmail;
use Illuminate\Database\Eloquent\Factories\HasFactory;
use Illuminate\Foundation\Auth\User as Authenticatable;
use Illuminate\Notifications\Notifiable;
use Laravel\Sanctum\HasApiTokens;
use PHPOpenSourceSaver\JWTAuth\Contracts\JWTSubject;

class User extends Authenticatable implements JWTSubject
{
    use HasApiTokens, HasFactory, Notifiable;

    /**
     * The attributes that are mass assignable.
     *
     * @var array<int, string>
     */
    protected $fillable = [
        'name',
        'email',
        'password',
    ];

    /**
     * The attributes that should be hidden for serialization.
     *
     * @var array<int, string>
     */
    protected $hidden = [
        'password',
        'remember_token',
    ];

    /**
     * The attributes that should be cast.
     *
     * @var array<string, string>
     */
    protected $casts = [
        'email_verified_at' => 'datetime',
    ];


    /**
     * Get the identifier that will be stored in the subject claim of the JWT.
     *
     * @return mixed
     */
    public function getJWTIdentifier()
    {
        return $this->getKey();
    }

    /**
     * Return a key value array, containing any custom claims to be added to the JWT.
     *
     * @return array
     */
    public function getJWTCustomClaims()
    {
        return [];
    }
}
Step 6: Create the AuthController
Create a controller using this command:
php artisan make:controller AuthController
Then add these codes:
app/Http/Controllers/AuthController.php
<?php

namespace App\Http\Controllers;

use Illuminate\Support\Facades\Auth;
use App\Http\Controllers\Controller;
use App\Models\User;
use Validator;


class AuthController extends Controller
{
    /**
     * Create a new AuthController instance.
     *
     * @return void
     */
    public function __construct()
    {
        $this->middleware('auth:api', ['except' => ['login', 'register']]);
    }


    /**
     * Register a User.
     *
     * @return \Illuminate\Http\JsonResponse
     */
    public function register() {
        $validator = Validator::make(request()->all(), [
            'name' => 'required',
            'email' => 'required|email|unique:users',
            'password' => 'required|confirmed|min:8',
        ]);

        if($validator->fails()){
            return response()->json($validator->errors()->toJson(), 400);
        }

        $user = new User;
        $user->name = request()->name;
        $user->email = request()->email;
        $user->password = bcrypt(request()->password);
        $user->save();

        return response()->json($user, 201);
    }


    /**
     * Get a JWT via given credentials.
     *
     * @return \Illuminate\Http\JsonResponse
     */
    public function login()
    {
        $credentials = request(['email', 'password']);

        if (! $token = auth()->attempt($credentials)) {
            return response()->json(['error' => 'Unauthorized'], 401);
        }

        return $this->respondWithToken($token);
    }

    /**
     * Get the authenticated User.
     *
     * @return \Illuminate\Http\JsonResponse
     */
    public function me()
    {
        return response()->json(auth()->user());
    }

    /**
     * Log the user out (Invalidate the token).
     *
     * @return \Illuminate\Http\JsonResponse
     */
    public function logout()
    {
        auth()->logout();

        return response()->json(['message' => 'Successfully logged out']);
    }

    /**
     * Refresh a token.
     *
     * @return \Illuminate\Http\JsonResponse
     */
    public function refresh()
    {
        return $this->respondWithToken(auth()->refresh());
    }

    /**
     * Get the token array structure.
     *
     * @param  string $token
     *
     * @return \Illuminate\Http\JsonResponse
     */
    protected function respondWithToken($token)
    {
        return response()->json([
            'access_token' => $token,
            'token_type' => 'bearer',
            'expires_in' => auth()->factory()->getTTL() * 60
        ]);
    }
}
Step 6: Register Routes
then register the routes on routes/api.php:
<?php

use Illuminate\Http\Request;
use Illuminate\Support\Facades\Route;
use App\Http\Controllers\AuthController;

/*
|--------------------------------------------------------------------------
| API Routes
|--------------------------------------------------------------------------
|
| Here is where you can register API routes for your application. These
| routes are loaded by the RouteServiceProvider within a group which
| is assigned the "api" middleware group. Enjoy building your API!
|
*/

Route::middleware('auth:sanctum')->get('/user', function (Request $request) {
    return $request->user();
});

Route::group([

    'middleware' => 'api',
    'prefix' => 'auth'

], function ($router) {
    Route::post('/register', [AuthController::class, 'register'])->name('register');
    Route::post('/login', [AuthController::class, 'login'])->name('login');
    Route::post('/logout', [AuthController::class, 'logout'])->name('logout');
    Route::post('/refresh', [AuthController::class, 'refresh'])->name('refresh');
    Route::post('/me', [AuthController::class, 'me'])->name('me');
});
Step 7: Run the App
Run the laravel app:
php artisan serve
Screenshots:
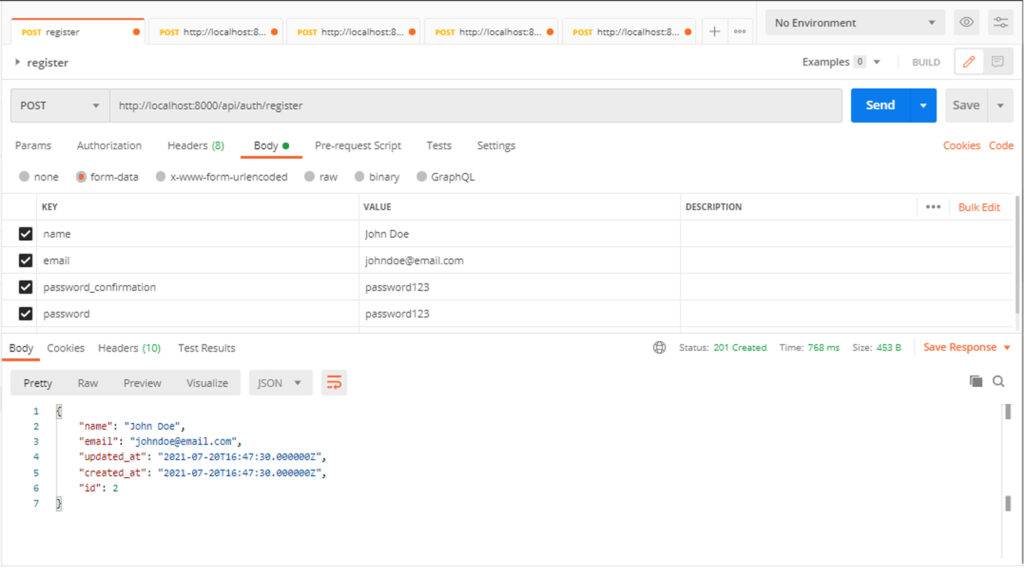
/api/auth/register (This route will be used for registering new users)
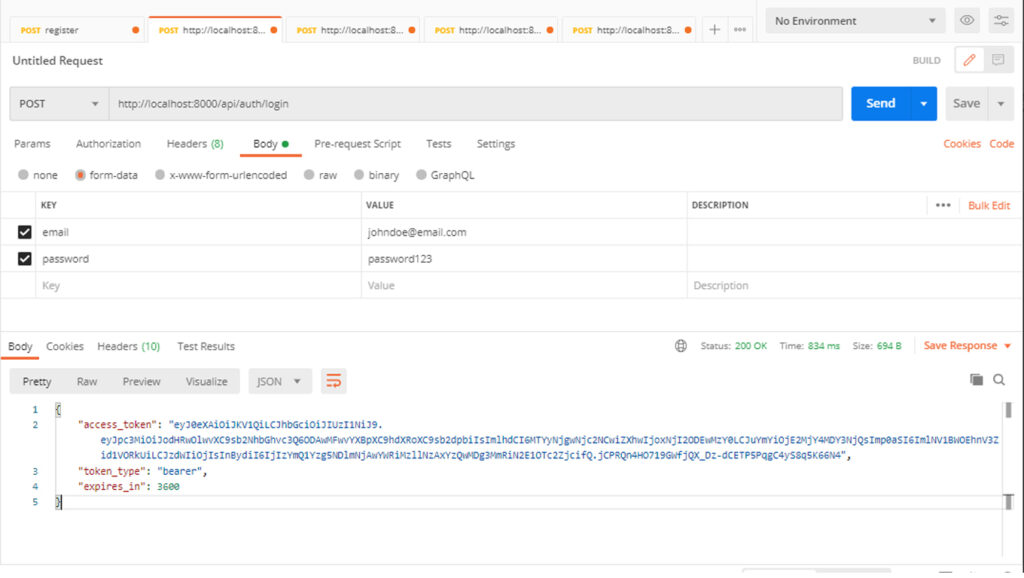
/api/auth/login (This route will be used for login and for getting the bearer token)
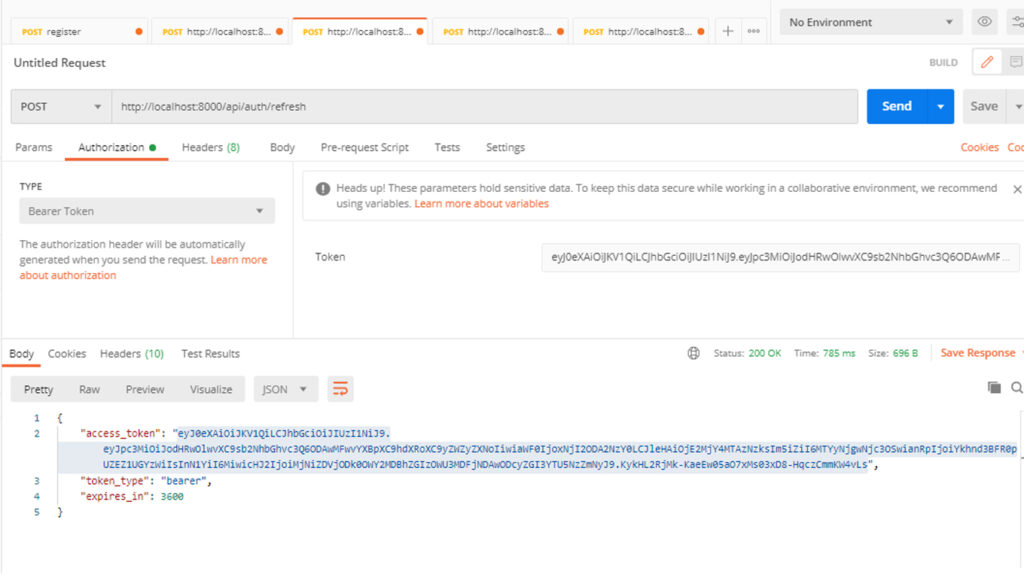
/api/auth/refresh (This route will be used on refreshing the bearer token)
/api/auth/me (this route is for getting the authenticated user’s information)
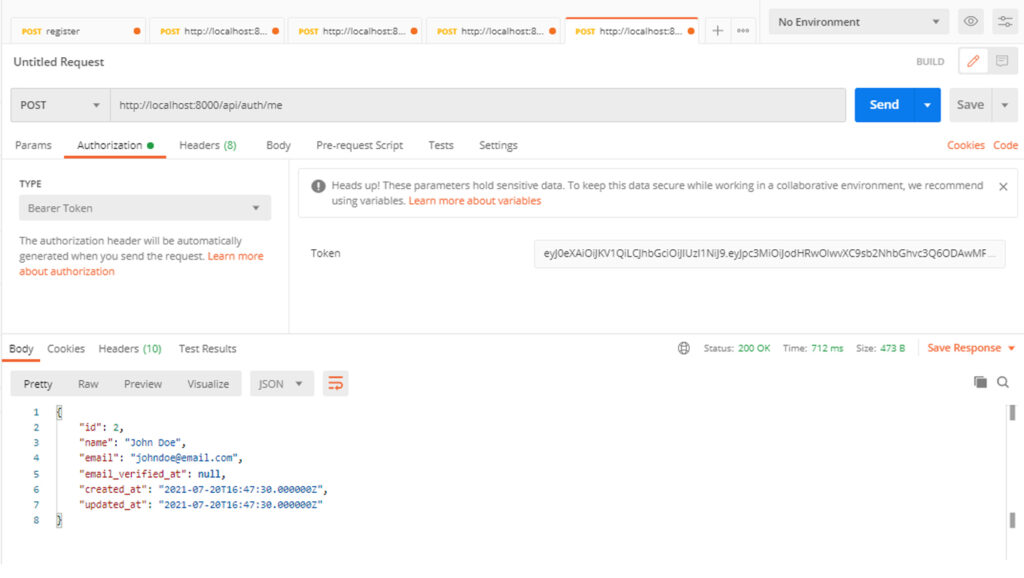
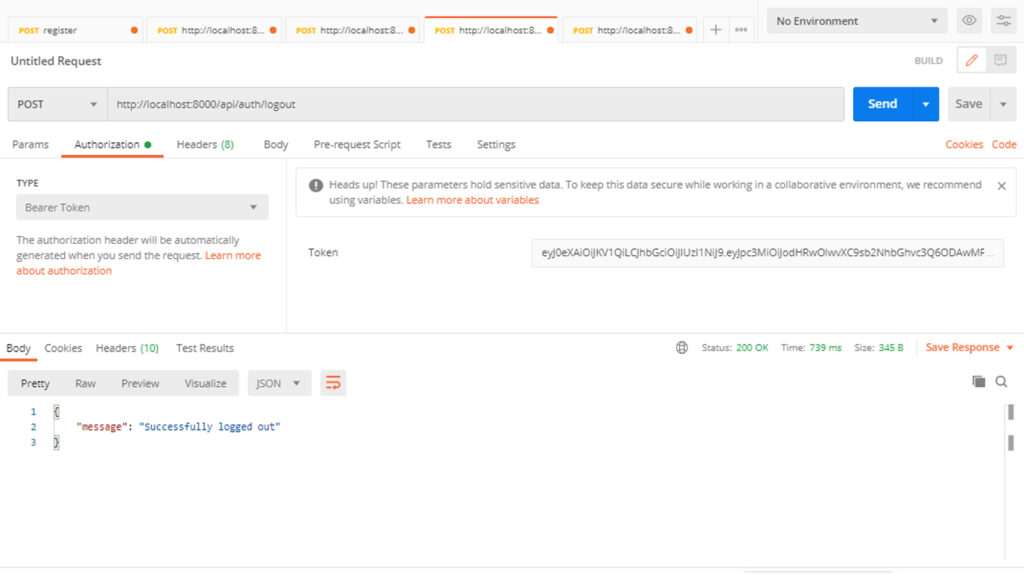
/api/auth/logout (this route is used for logging out the authenticated user)
