Contents
Introduction:
Today, I will show a step-by-step procedure on developing a Laravel 7 CRUD App. Learning the Laravel Framework gives you a lot of advantages because it is one of the most in-demand PHP web framework in the market today.
Laravel is a free, open-source PHP Web Framework and intended for the development of web applications following the MVC (Model-View-Controller) architectural pattern. Laravel is designed to make developing web apps faster and easier by using the built-in features.
CRUD is an acronym for CREATE, READ, UPDATE, DELETE. The four basic functions in any type of programming. CRUD typically refers to operations performed in a database.
- Create -Generate new record/s.
- Read – Reads or retrieve record/s.
- Update – Modify record/s.
- Delete – Destroy or remove record/s.
Prerequisite:
- Composer
- MySQL
- PHP >= 7.2.5
Before proceeding on this tutorial, you must have an environment already setup to run and install Laravel. If you haven’t, please do read my blog – How to Install Laravel 7 in Windows with XAMPP and Composer Easy Tutorial.
Step 1: Install Laravel 7 Using Composer
First, select a folder that you want the Laravel to be installed then execute this command on Terminal or CMD to install Laravel 7:
composer create-project --prefer-dist laravel/laravel project-manager
Step 2: Set Database Configuration
After installing, Open the Laravel app folder and open the .env file and set database configuration:
.env
DB_CONNECTION=mysql
DB_HOST=127.0.0.1
DB_PORT=3306
DB_DATABASE=your database name(project_manager)
DB_USERNAME=your database username(root)
DB_PASSWORD=your database password(root)
Step 3: Create Model and Database Migration
Model – it a class that represents a database table.
Migration – like version control for the database that allows us to modify and share database schema to your team.
Execute this command on the Terminal or CMD to create a model and migration:
php artisan make:model Project --migration
After this command you will find one file in this path “database/migrations” and put the code below on the migration file.
<?php

use Illuminate\Support\Facades\Schema;
use Illuminate\Database\Schema\Blueprint;
use Illuminate\Database\Migrations\Migration;

class CreateProjectsTable extends Migration
{
    /**
     * Run the migrations.
     *
     * @return void
     */
    public function up()
    {
        Schema::create('projects', function (Blueprint $table) {
            $table->increments('id');
            $table->string('name');
            $table->text('description');
            $table->timestamps();
        });
    }

    /**
     * Reverse the migrations.
     *
     * @return void
     */
    public function down()
    {
        Schema::dropIfExists('projects');
    }
}
Run the migration by executing the migrate Artisan command:
php artisan migrate
Step 4: Create A Resource Controller
Resource Controller is a controller that handles all HTTP request stored by your application.
Execute this command to create a resource controller:
php artisan make:controller ProjectController --resource
This command will generate a controller at “app/Http/Controllers/ProjectController.php”. It contains methods for each of the available resource operations. Open the file and insert these codes:
app/Http/Controllers/ProjectController.php
<?php

namespace App\Http\Controllers;

use App\Project;
use Illuminate\Http\Request;

class ProjectController extends Controller
{
    /**
     * Display a listing of the resource.
     *
     * @return \Illuminate\Http\Response
     */
    public function index()
    {
        $projects = Project::get();
        return view('projects.index',['projects' => $projects]);
    }

    /**
     * Show the form for creating a new resource.
     *
     * @return \Illuminate\Http\Response
     */
    public function create()
    {
        return view('projects.create');
    }

    /**
     * Store a newly created resource in storage.
     *
     * @param  \Illuminate\Http\Request  $request
     * @return \Illuminate\Http\Response
     */
    public function store(Request $request)
    {
        request()->validate([
            'name' => 'required|max:255',
            'description' => 'required',
        ]);

        $project = new Project();
        $project->name = $request->name;
        $project->description = $request->description;
        $project->save();

        return redirect()->route('projects.index')
                        ->with('success','Project saved successfully!');
    }

    /**
     * Display the specified resource.
     *
     * @param  int  $id
     * @return \Illuminate\Http\Response
     */
    public function show($id)
    {
        $project = Project::find($id);

        return view('projects.show', ['project' => $project]);
    }

    /**
     * Show the form for editing the specified resource.
     *
     * @param  int  $id
     * @return \Illuminate\Http\Response
     */
    public function edit($id)
    {
        $project = Project::find($id);

        return view('projects.edit', ['project' => $project]);
    }

    /**
     * Update the specified resource in storage.
     *
     * @param  \Illuminate\Http\Request  $request
     * @param  int  $id
     * @return \Illuminate\Http\Response
     */
    public function update(Request $request, $id)
    {
         request()->validate([
            'name' => 'required|max:255',
            'description' => 'required',
        ]);

        $project = Project::find($id);
        $project->name = $request->name;
        $project->description = $request->description;
        $project->save();

        return redirect()->route('projects.index')
                        ->with('success','Project updated successfully!');
    }

    /**
     * Remove the specified resource from storage.
     *
     * @param  int  $id
     * @return \Illuminate\Http\Response
     */
    public function destroy($id)
    {
        Project::destroy($id);
        return redirect()->route('projects.index')
                        ->with('success','Project deleted successfully!');
    }
}
Step 5: Register a Resourceful Route
After creating a resource controller, register a resourceful route.
routes/web.php
Route::resource('projects', 'ProjectController');
This single route will create multiple routes to handle the CRUD actions on the resource.
Step 6: Create Blade Files
Blade is the simple but powerful templating engine in laravel. blade view files have a .blade.php files extension and usually stores on “resources/views/” folder.
We will use Bootstrap to make our simple CRUD app presentable. Bootstrap is a free and most popular open-source CSS framework for building responsive and mobile-first web projects.
Create a folder named “projects” inside this following path “resources/views/”. Inside the “projects” folder create the following blade files:
- layout.blade.php
- index.blade.php
- show.blade.php
- create.blade.php
- edit.blade.php
After creating the blade files, Insert the code below:
resources/views/projects/layout.blade.php
<!DOCTYPE html>
<html>
<head>
	<title>Laravel Project Manager</title>
	<link href="https://cdnjs.cloudflare.com/ajax/libs/twitter-bootstrap/4.4.0/js/bootstrap.min.js" rel="stylesheet">
	<link href="https://stackpath.bootstrapcdn.com/bootstrap/4.4.1/css/bootstrap.min.css" rel="stylesheet" integrity="sha384-Vkoo8x4CGsO3+Hhxv8T/Q5PaXtkKtu6ug5TOeNV6gBiFeWPGFN9MuhOf23Q9Ifjh" crossorigin="anonymous">
</head>
<body>


<div class="container">
    @yield('content')
</div>


</body>
</html>
resources/views/projects/index.blade.php
@extends('projects.layout')


@section('content')
    <div class="container">
        <h2 class="text-center mt-5 mb-3">Laravel Project Manager</h2>
        <div class="card">
            <div class="card-header">
                <a class="btn btn-outline-primary" href="{{ route('projects.create') }}">
                    Create New Project
                </a>
            </div>
            <div class="card-body">

                @if ($message = Session::get('success'))
                    <div class="alert alert-success">
                        <b>{{ $message }}</b>
                    </div>
                @endif


                <table class="table table-bordered">
                    <tr>
                        <th>Name</th>
                        <th>Description</th>
                        <th width="240px">Action</th>
                    </tr>
                    @foreach ($projects as $project)
                    <tr>
                        <td>{{ $project->name }}</td>
                        <td>{{ $project->description }}</td>
                        <td>
                            <form action="{{ route('projects.destroy',$project->id) }}" method="POST">
                                <a
                                    class="btn btn-outline-info"
                                    href="{{ route('projects.show',$project->id) }}">
                                    Show
                                </a>
                                <a
                                    class="btn btn-outline-success"
                                    href="{{ route('projects.edit',$project->id) }}">
                                    Edit
                                </a>
                                @csrf
                                @method('DELETE')
                                <button type="submit" class="btn btn-outline-danger">Delete</button>
                            </form>
                        </td>
                    </tr>
                    @endforeach
                </table>
            </div>
        </div>
    </div>
@endsection
resources/views/projects/show.blade.php
@extends('projects.layout')


@section('content')
    <div class="container">
        <h2 class="text-center mt-5 mb-3">Show Project</h2>
        <div class="card">
            <div class="card-header">
                <a class="btn btn-outline-info float-right" href="{{ route('projects.index') }}">
                    View All Projects
                </a>
            </div>
            <div class="card-body">
               <b class="text-muted">Name:</b>
               <p>{{$project->name}}</p>
               <b class="text-muted">Description:</b>
               <p>{{$project->description}}</p>
            </div>
        </div>
    </div>
@endsection
resources/views/projects/create.blade.php
@extends('projects.layout')


@section('content')
    <div class="container">
        <h2 class="text-center mt-5 mb-3">Create New Project</h2>
        <div class="card">
            <div class="card-header">
                <a class="btn btn-outline-info float-right" href="{{ route('projects.index') }}">
                    View All Projects
                </a>
            </div>
            <div class="card-body">
                @if ($errors->any())
                    <div class="alert alert-danger">
                        <ul>
                            @foreach ($errors->all() as $error)
                                <li>{{ $error }}</li>
                            @endforeach
                        </ul>
                    </div>
                @endif
                <form action="{{ route('projects.store') }}" method="POST">
                    @csrf
                    <div class="form-group">
                        <label for="name">Name</label>
                        <input type="text" class="form-control" id="name" name="name">
                    </div>
                    <div class="form-group">
                        <label for="description">Description</label>
                        <textarea class="form-control" id="description" rows="3" name="description"></textarea>
                    </div>

                    <button type="submit" class="btn btn-outline-primary">Save Project</button>
                </form>

            </div>
        </div>
    </div>

@endsection
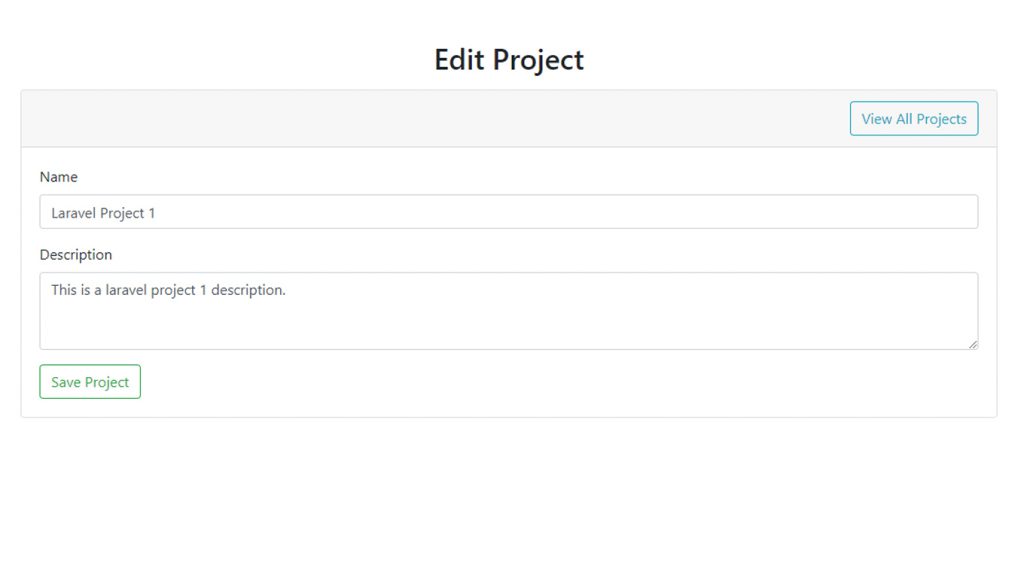
resources/views/projects/edit.blade.php
@extends('projects.layout')


@section('content')
    <div class="container">
        <h2 class="text-center mt-5 mb-3">Edit Project</h2>
        <div class="card">
            <div class="card-header">
                <a class="btn btn-outline-info float-right" href="{{ route('projects.index') }}">
                    View All Projects
                </a>
            </div>
            <div class="card-body">
                @if ($errors->any())
                    <div class="alert alert-danger">
                        <ul>
                            @foreach ($errors->all() as $error)
                                <li>{{ $error }}</li>
                            @endforeach
                        </ul>
                    </div>
                @endif
                <form action="{{ route('projects.update',$project->id) }}" method="POST">
                    @csrf
                    @method('PUT')
                    <div class="form-group">
                        <label for="name">Name</label>
                        <input type="text" class="form-control" id="name" name="name" value="{{ $project->name }}">
                    </div>
                    <div class="form-group">
                        <label for="description">Description</label>
                        <textarea class="form-control" id="description" rows="3" name="description">{{ $project->description }}</textarea>
                    </div>

                    <button type="submit" class="btn btn-outline-success">Save Project</button>
                </form>

            </div>
        </div>
    </div>


@endsection
Step 7 : Run the Application
After finishing the steps above, you can now run your application by executing the code below:
php artisan serve
After successfully running your app, open this URL in your browser:
http://localhost:8000/projects
Screenshots:
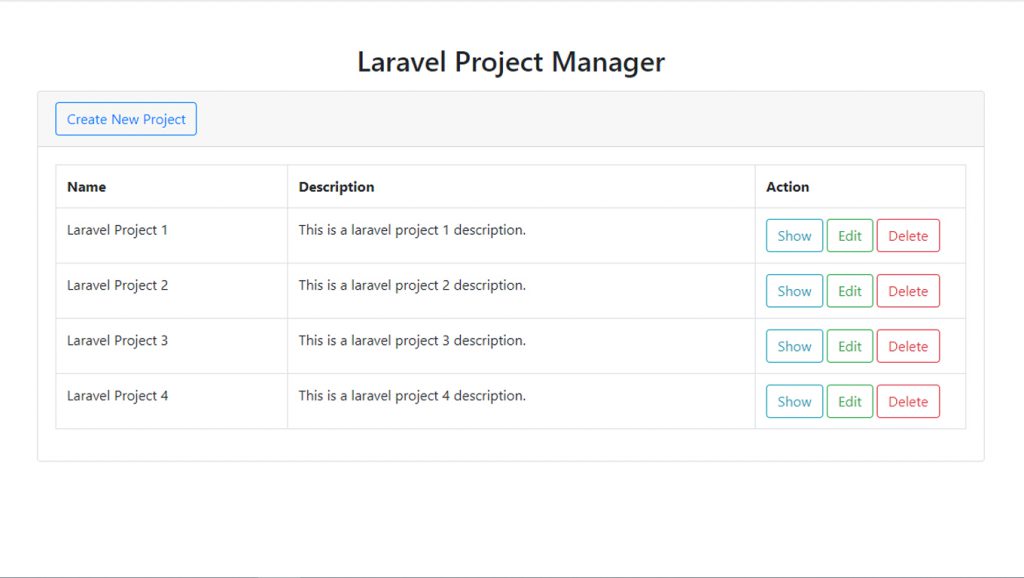
Laravel 7 Crud App (project index page):
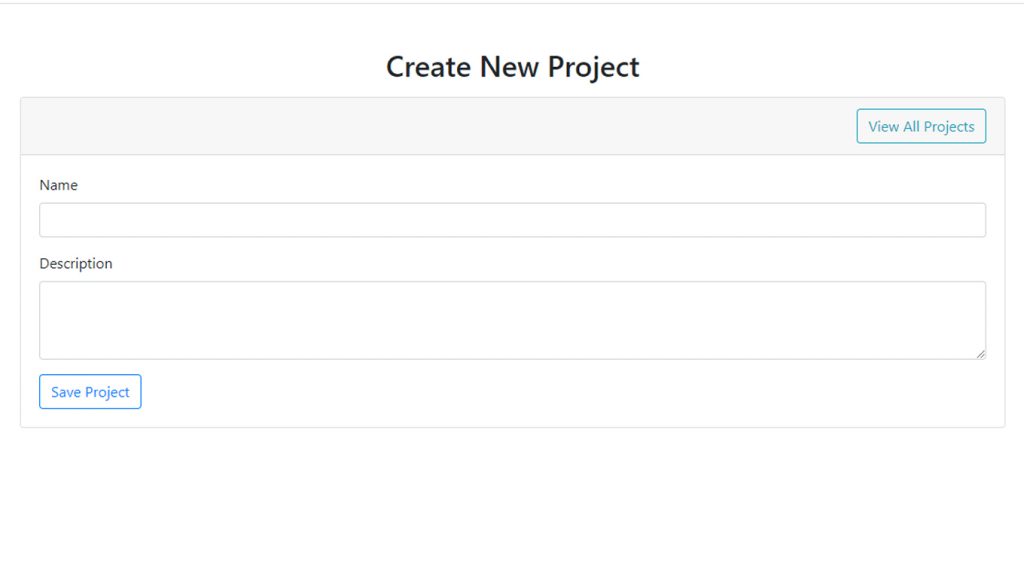
Laravel 7 Crud App (project create page):
Laravel 7 Crud App (project edit page):
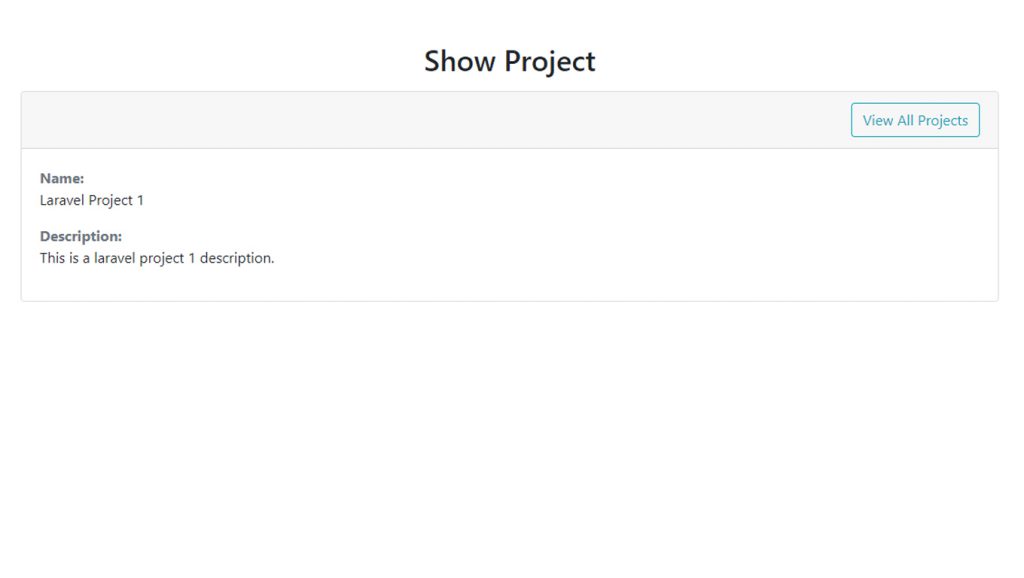
Laravel 7 Crud App (project show page):
